an arduino project
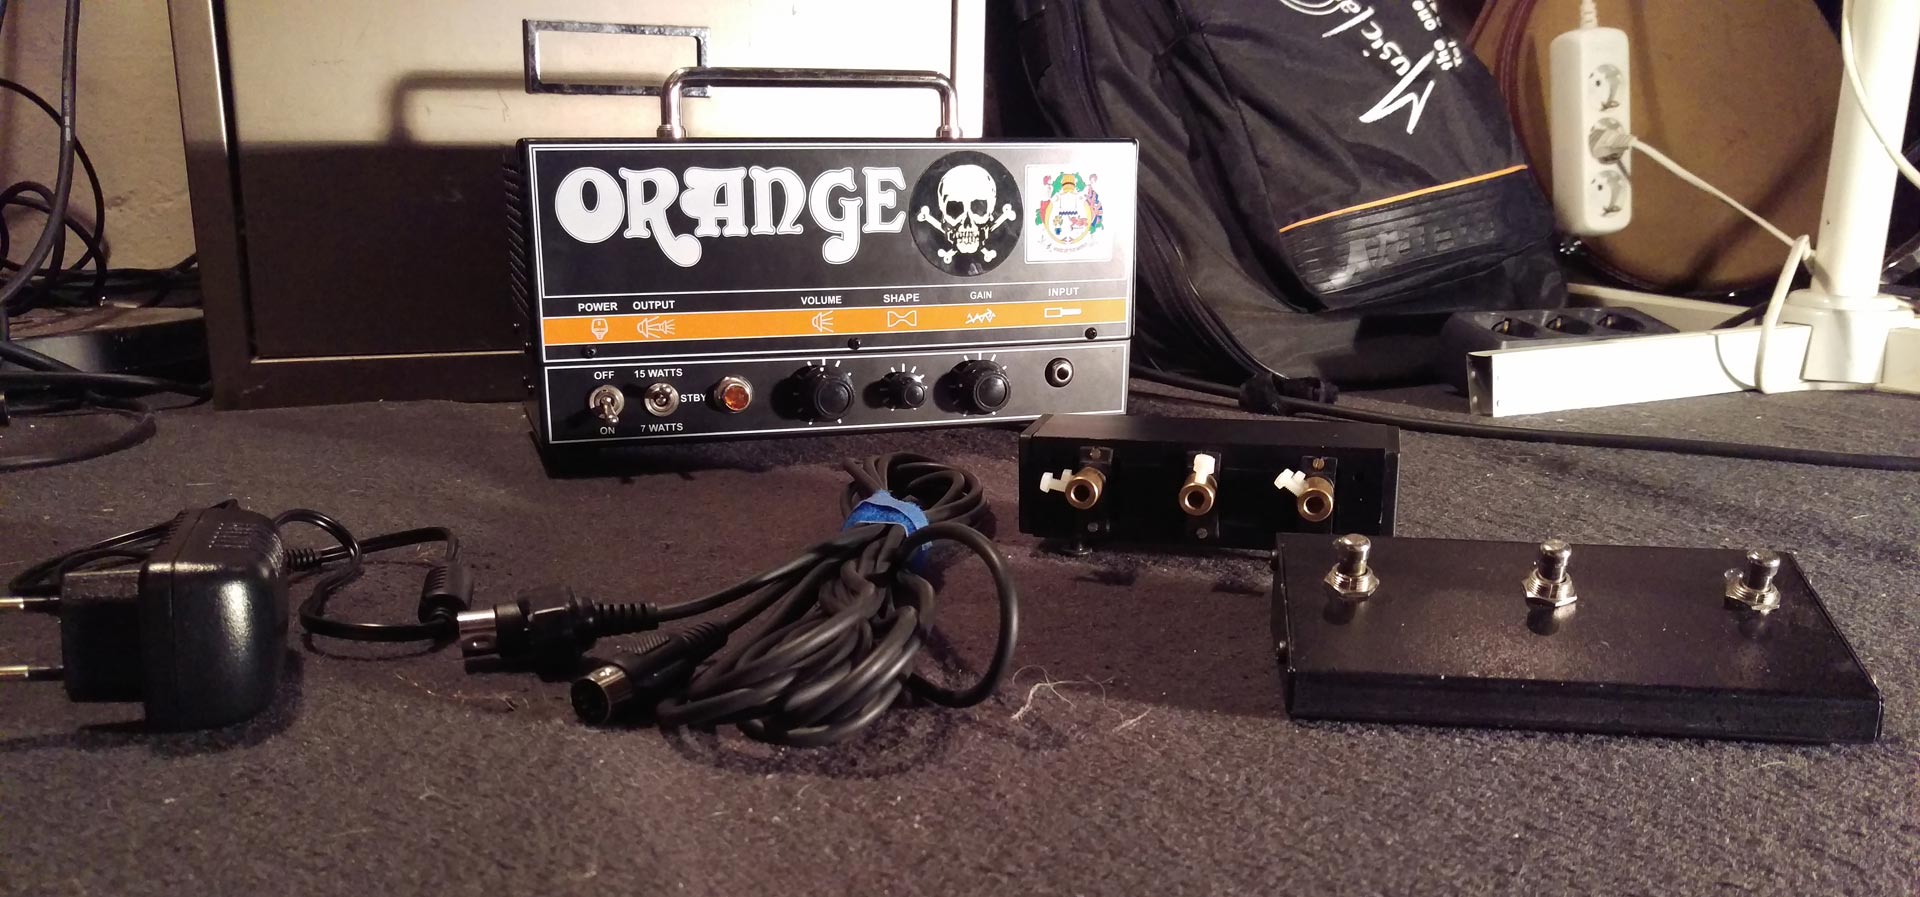
Having not enough funds to buy a propper 2-channel guitar head, i ended up buying an Orange Dark Terror head.
Only problem with this 1-channel head was changing the sound without having to stop playing my guitar.
I really like the heavy distorted metal sound of this little terror head, so using external effects wasn´t an option.
That´s where the idea of terrorBot was born… A little robot designed to change the 3 potis of the head controlled with a footswitch.
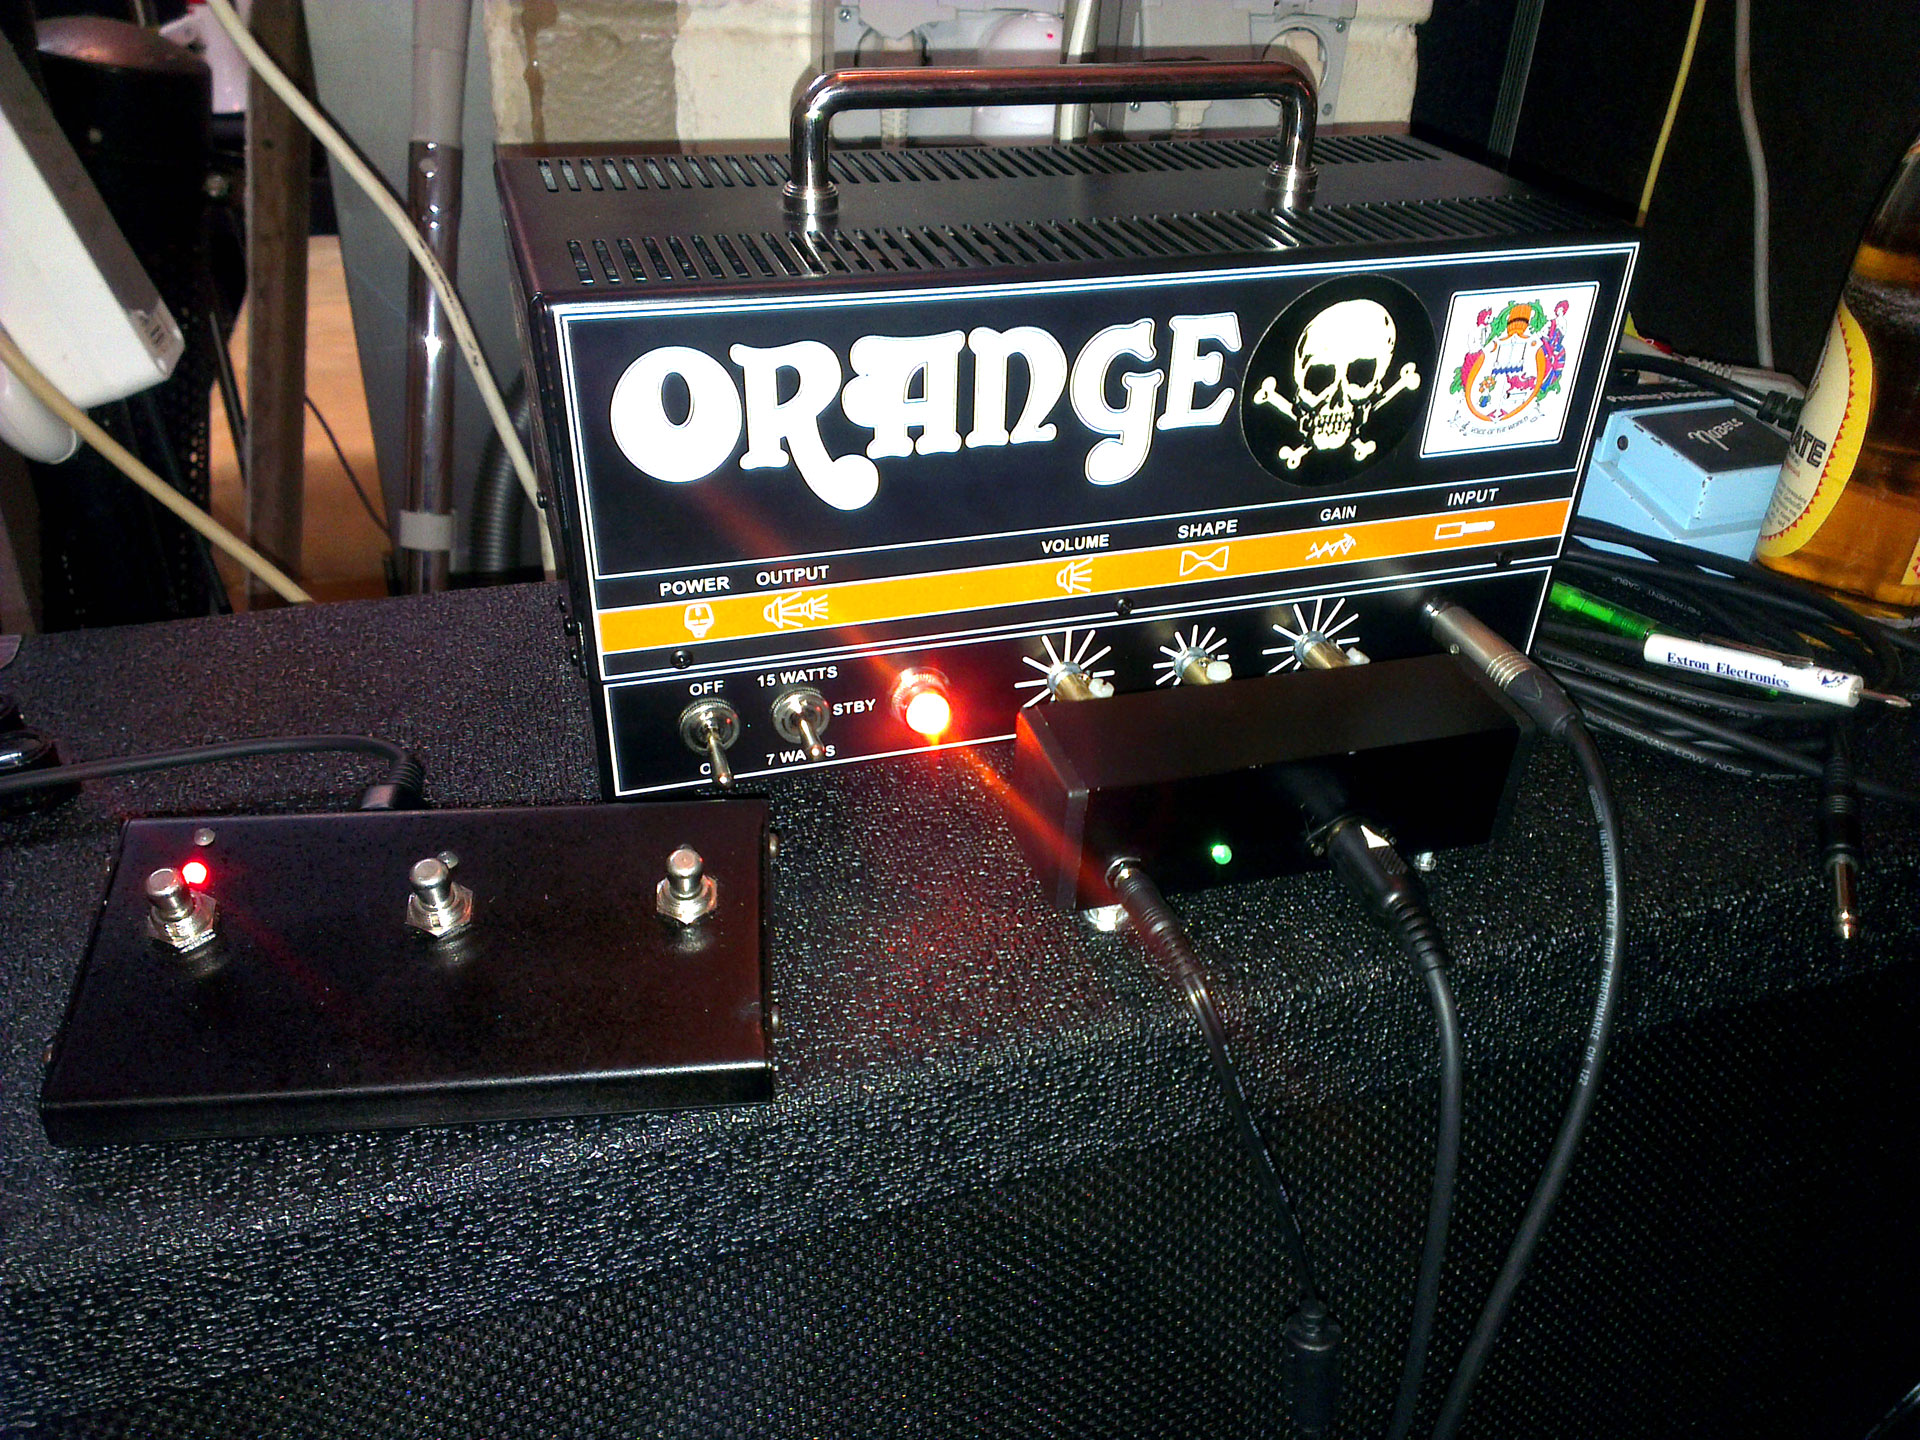
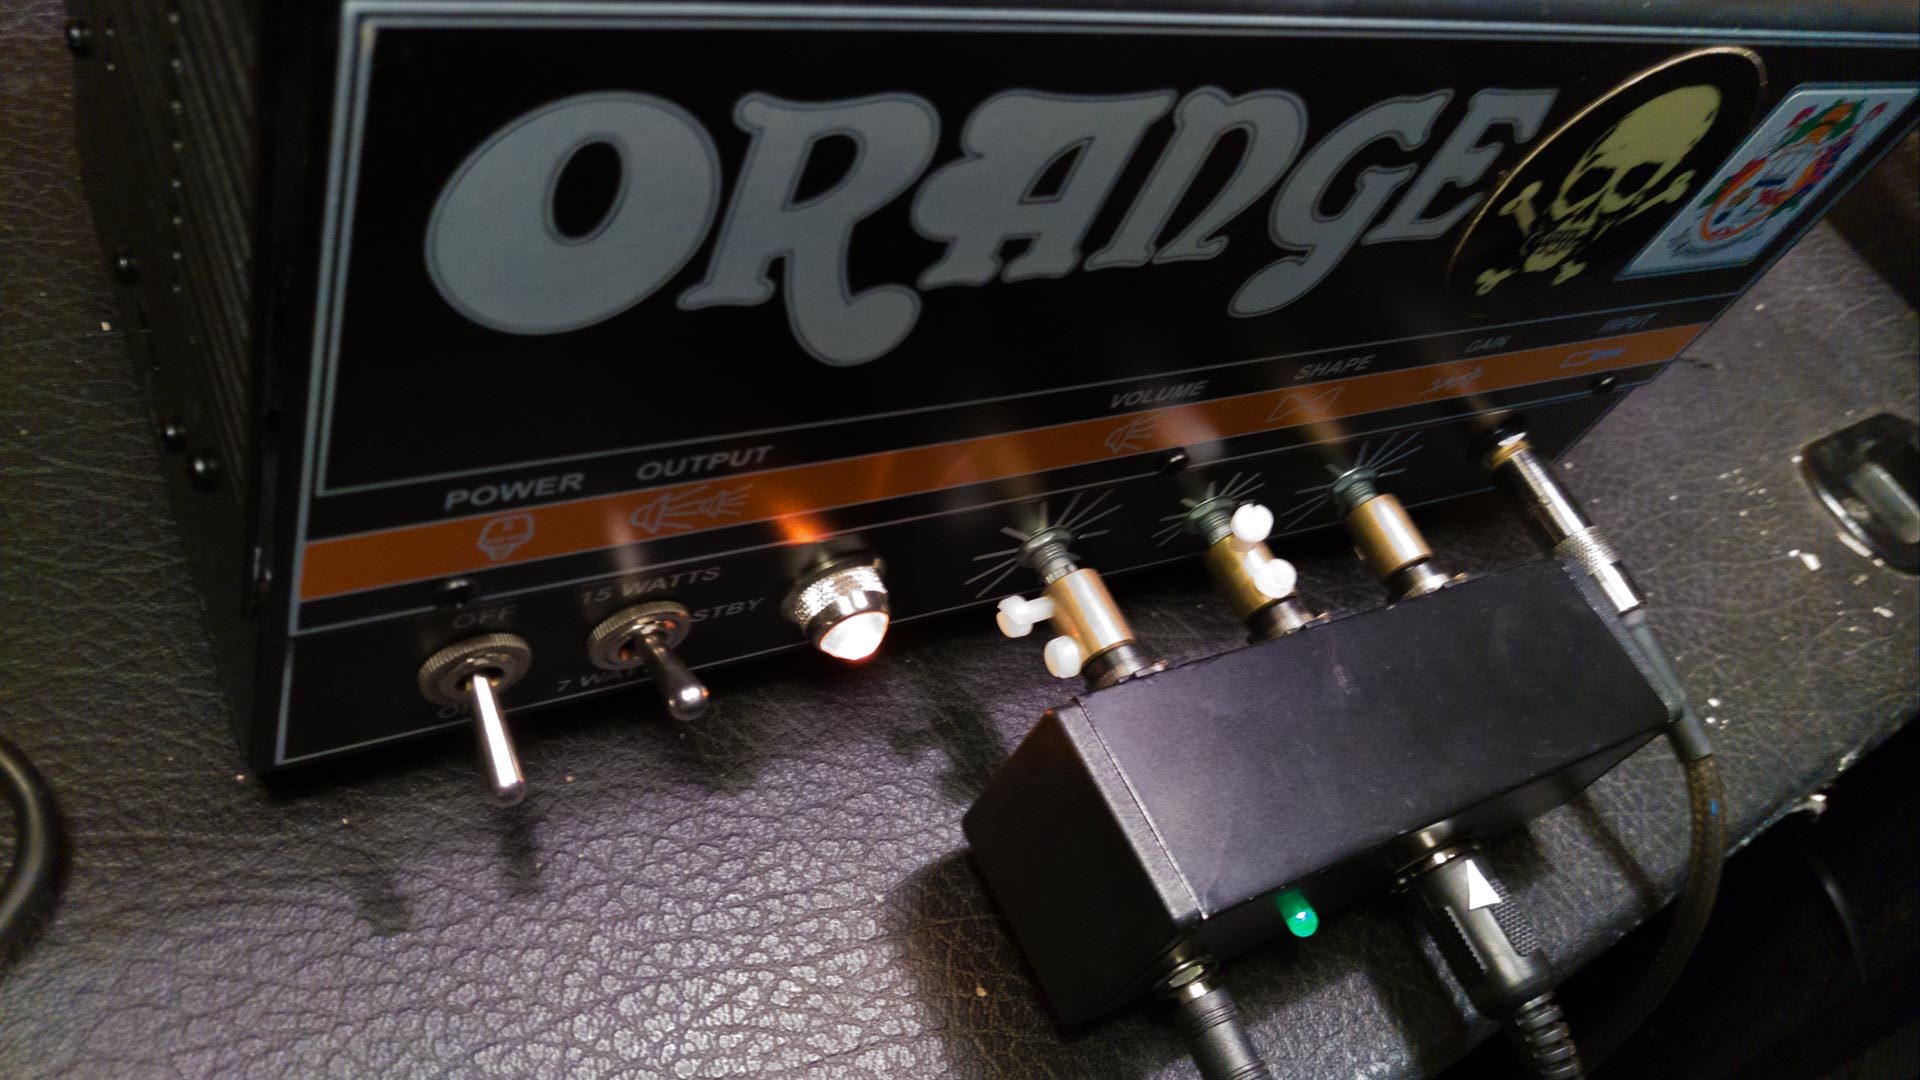
The goal was to create a cheap and easy to use robot that would´t need any modifications to the head itself except
pulling off the plastic caps from the potis. Also it had to be stable enough for rock´n´roll stage use.
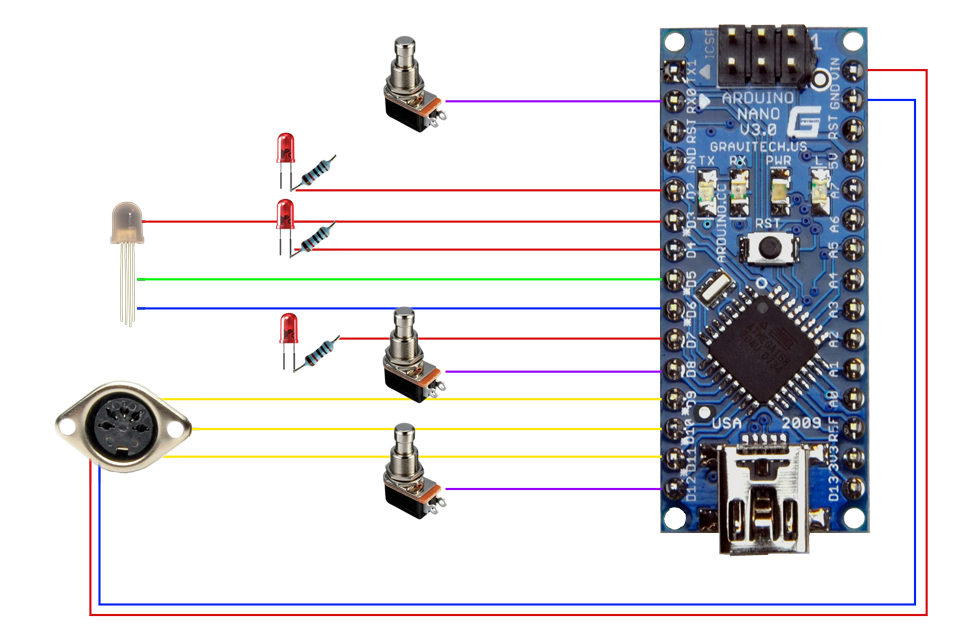
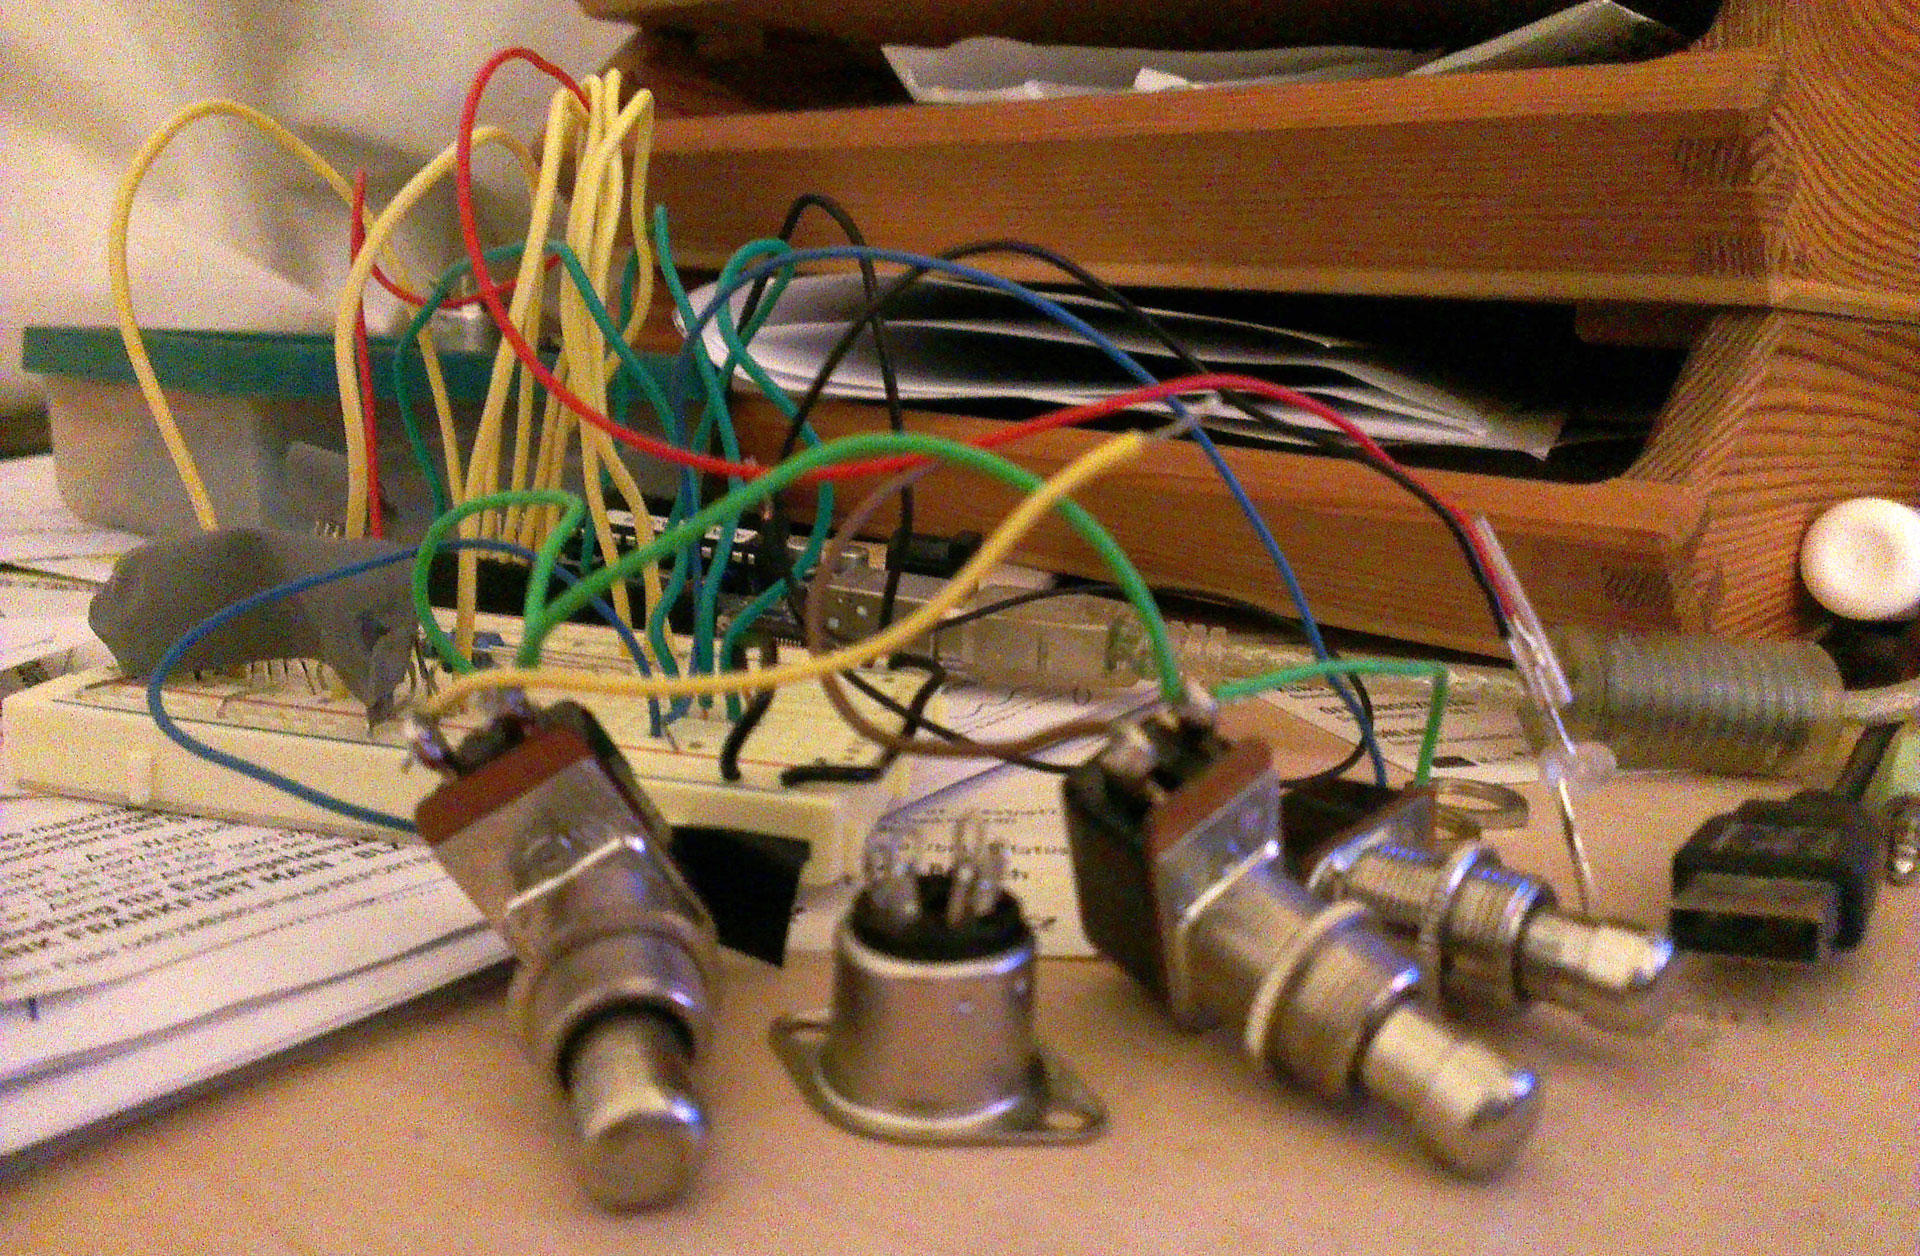
So i bought a second-hand footswitch with 3 pushbuttons (most of them have switches but that wouldn´t make any sense here),
an arduino nano and 3 cheap digital 180° servos. To keep the size small i had to place the arduino board into the footswitch.
I wanted the power supply to be inside the part with the servos near the head rather than having it on the footswitch,
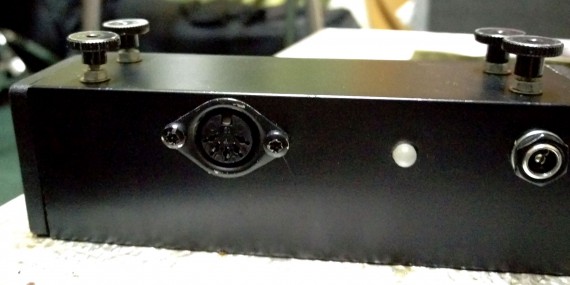
so the connection between those 2 parts needed 5 pins (power, ground, servo1, servo2, servo3).
I choose to use a standard 5m midi cable because it had one lying arround and the jacks are quite cheap.
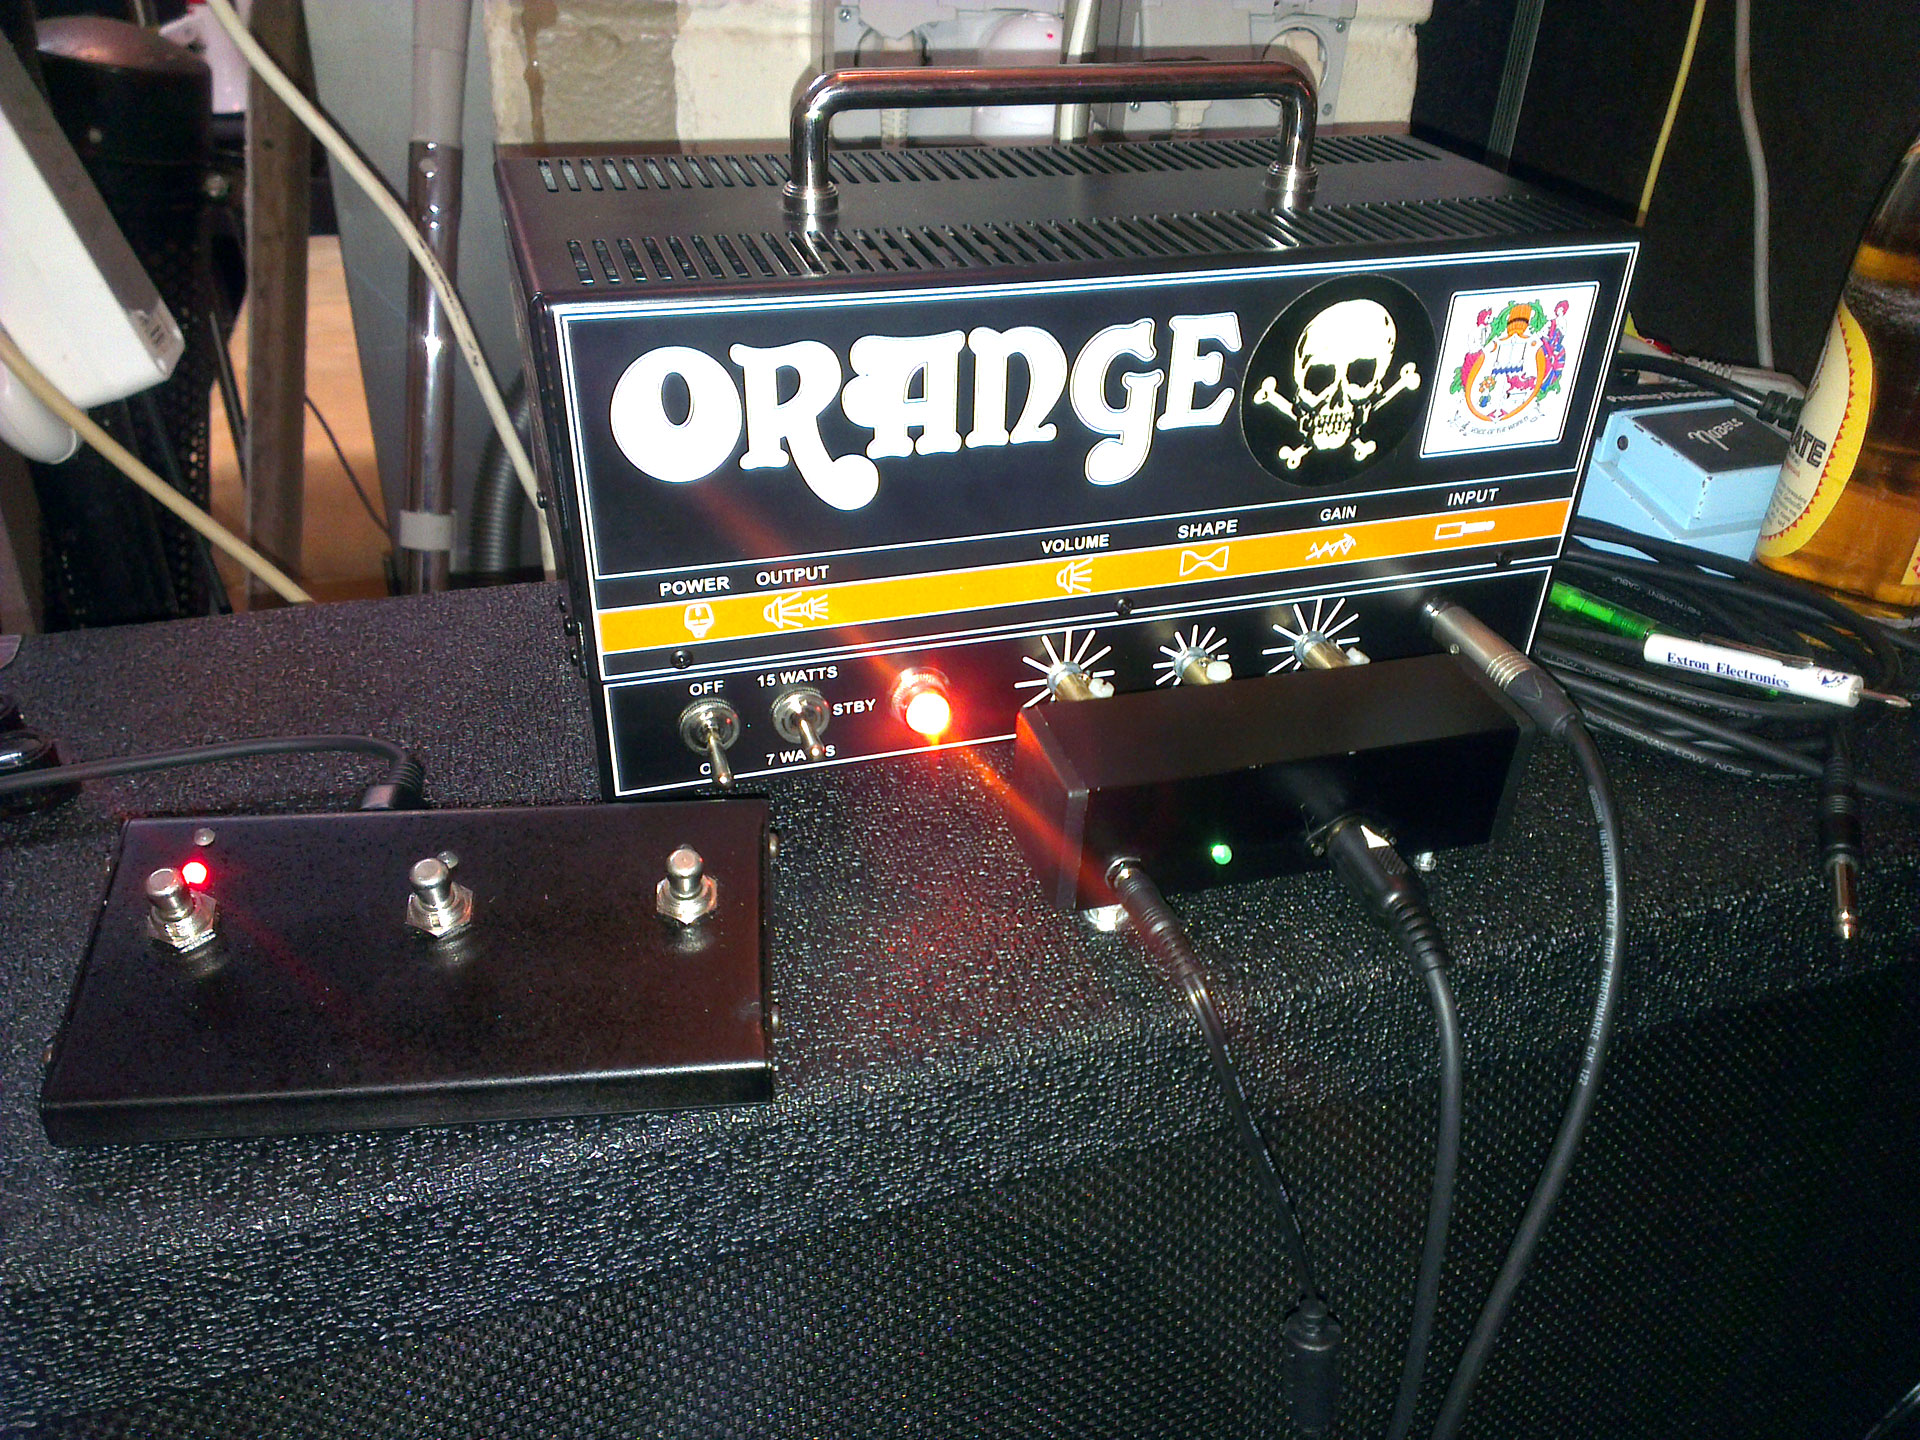
And this is the result in action:
With the great arduino IDE the first test version of the software was done really quick.
v1.4 ended up beeing the final version, containing some bugfixes and changes for better usability.
All versions are available on GitHub for those who want to know how i did the programming…
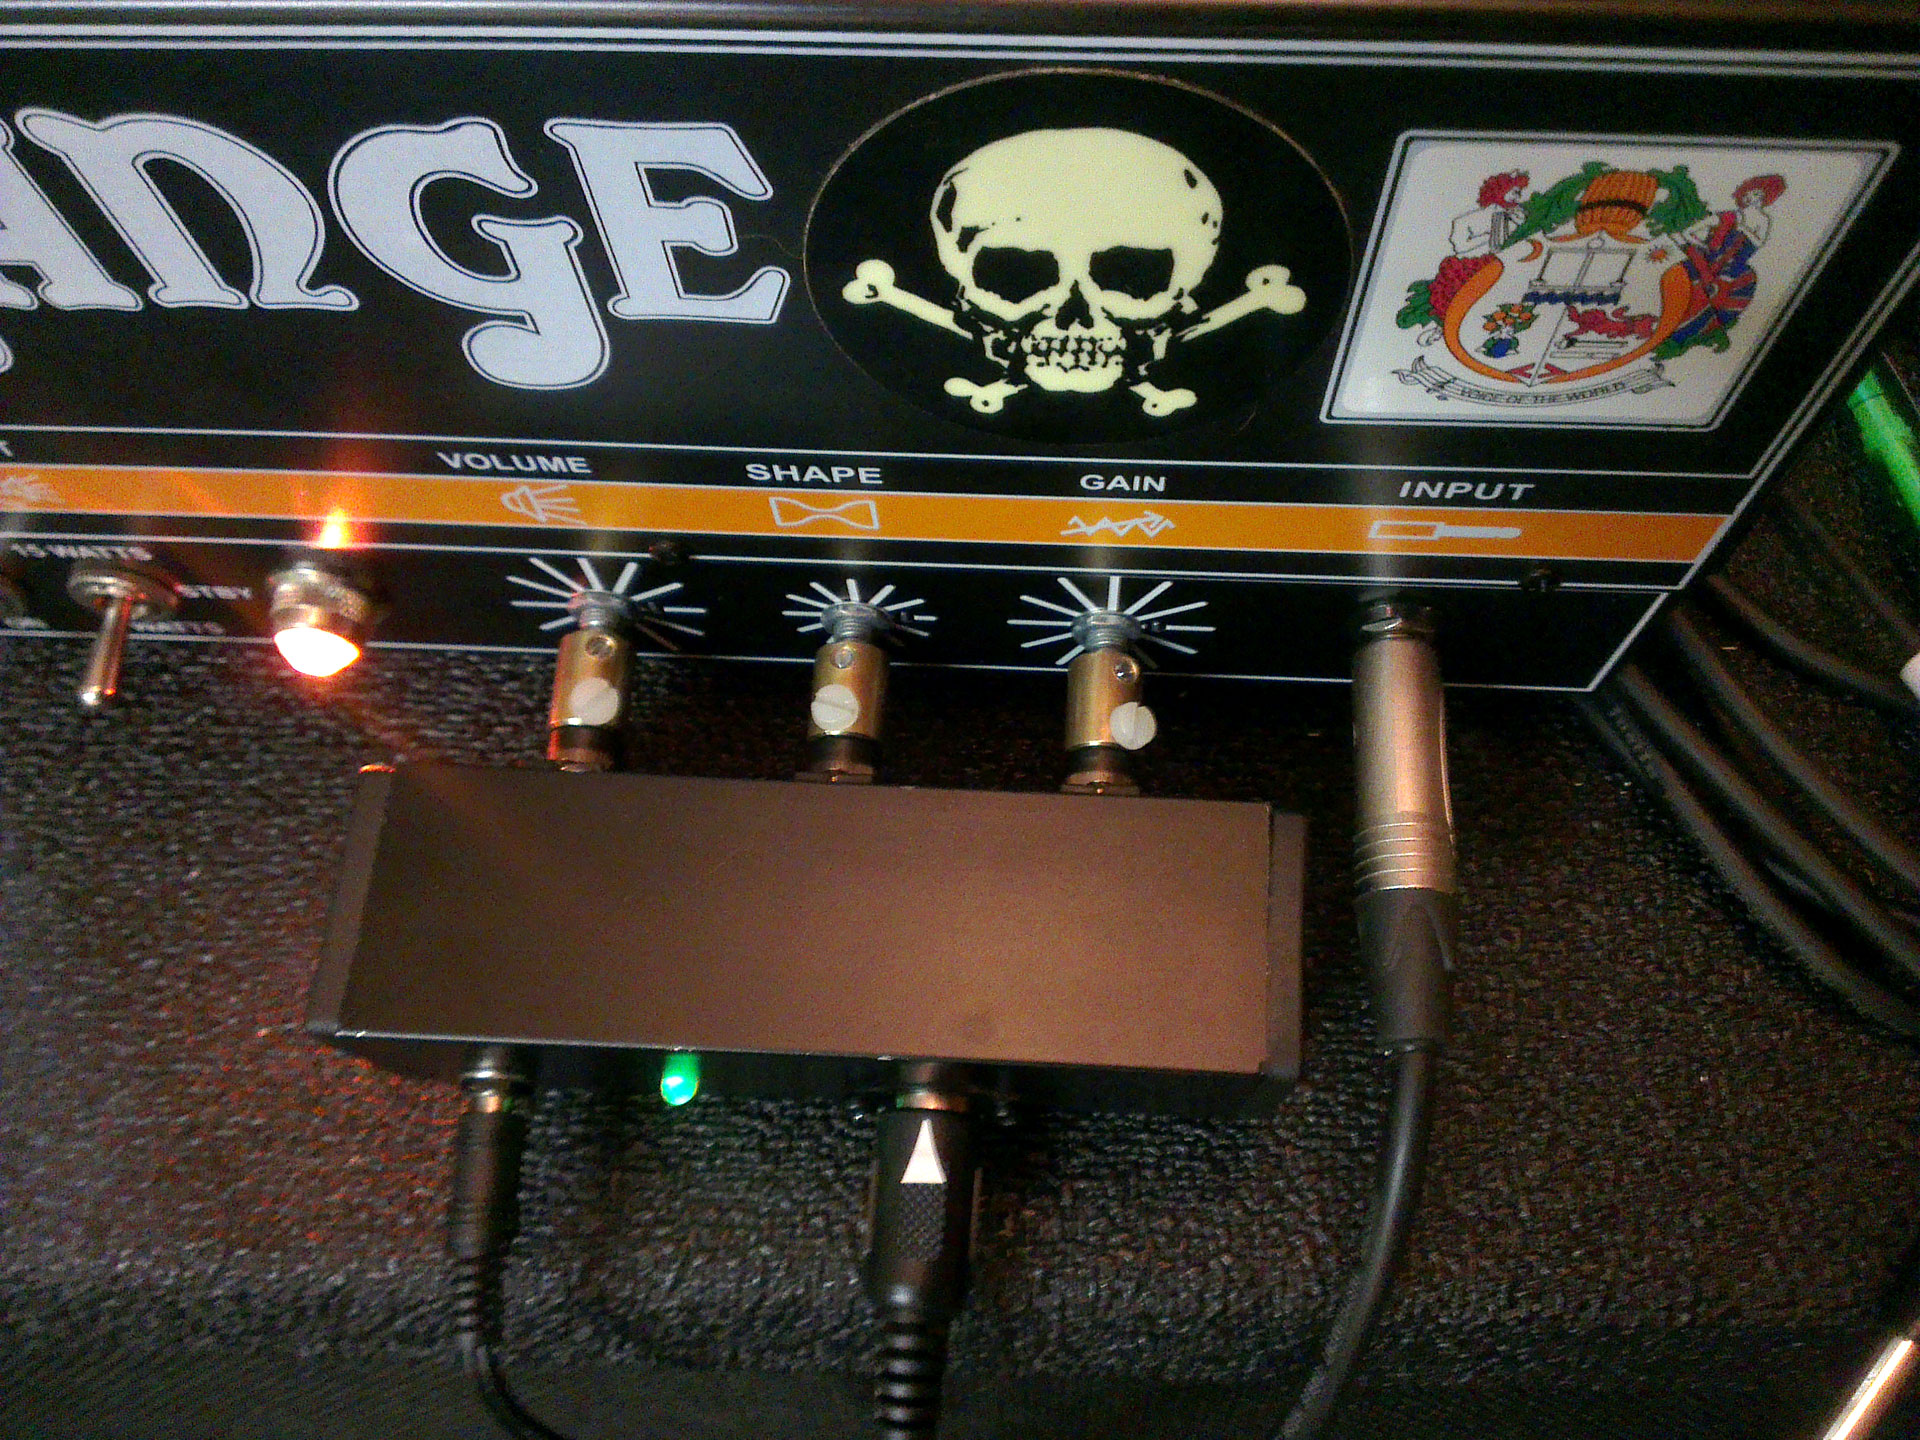
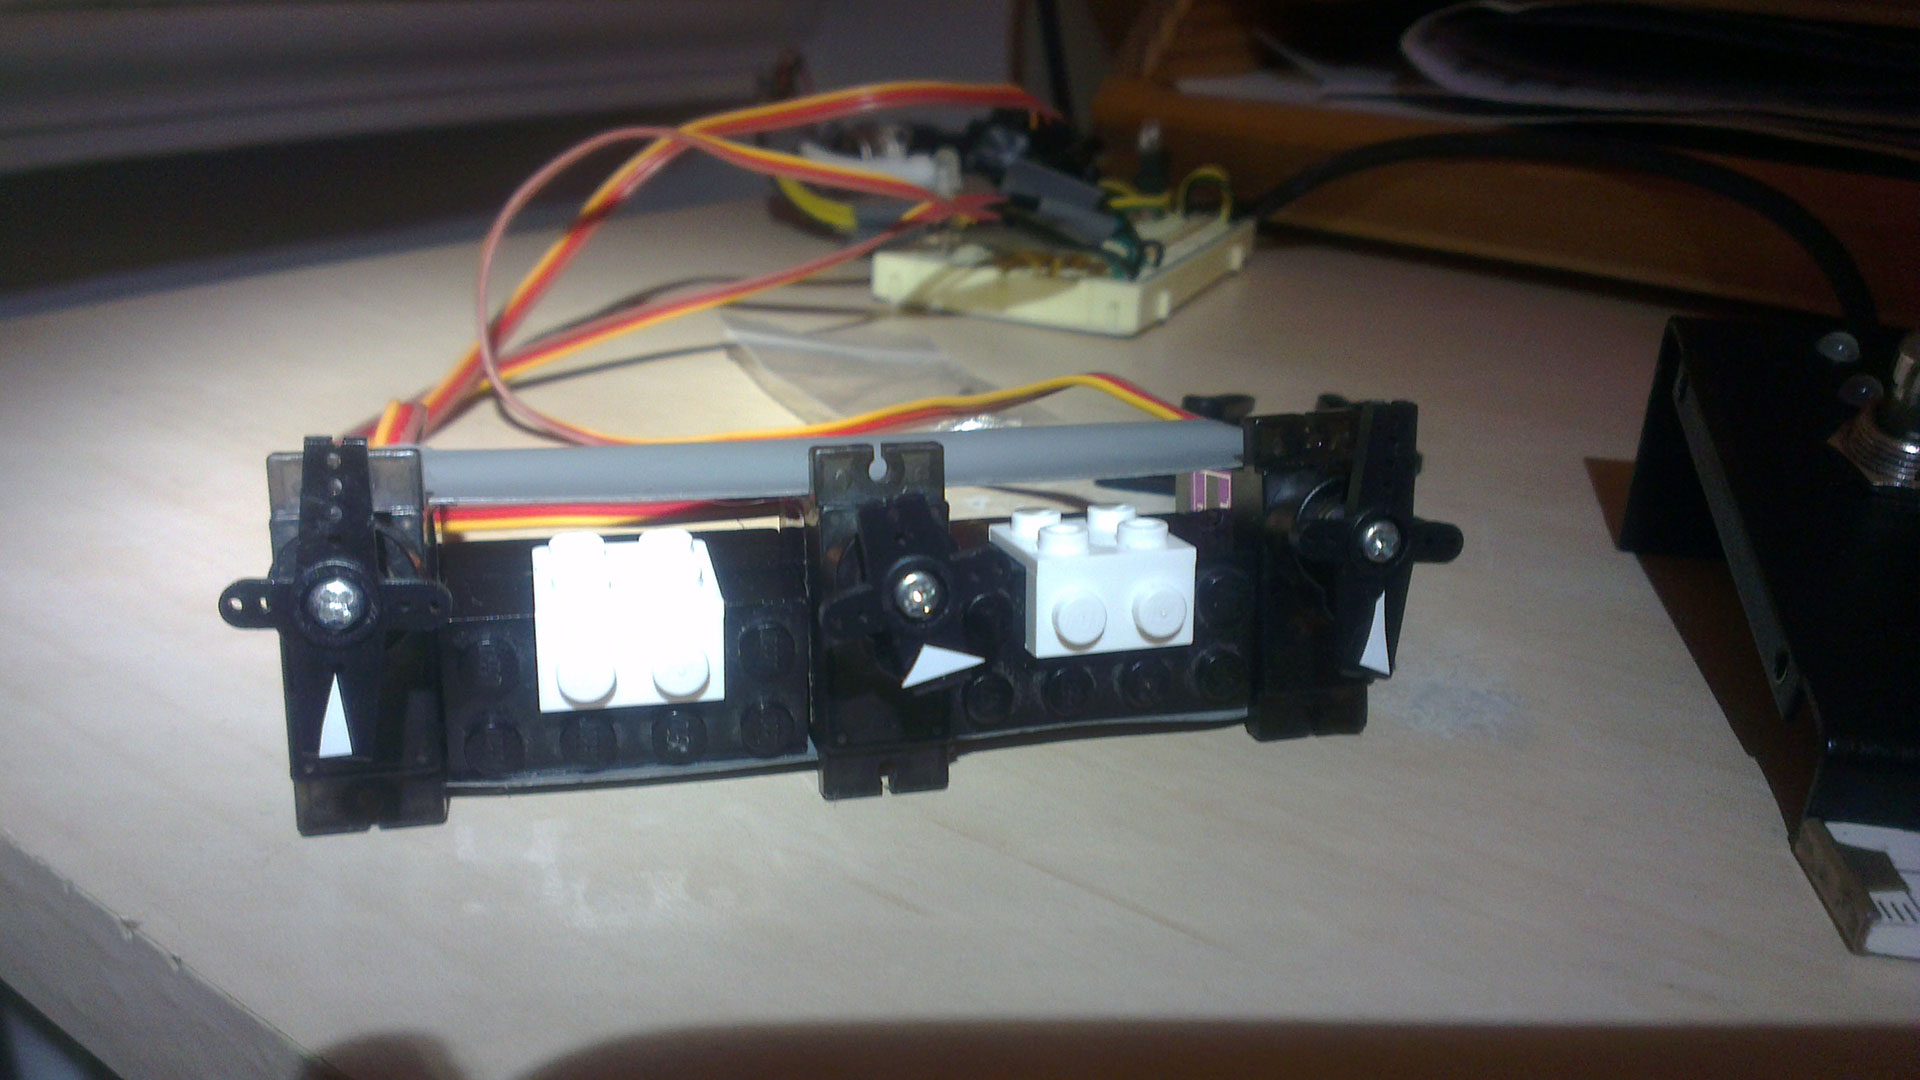
The biggest challange was finding a way to securely attach the servos to the potis, so it wouldn´t fall off during use…
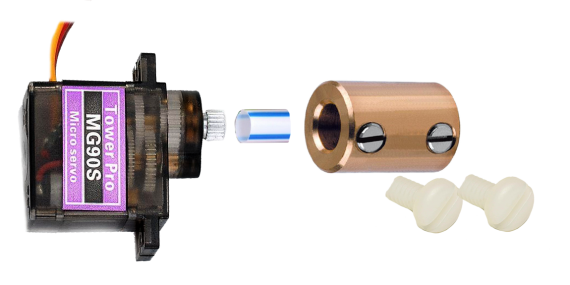
After some time of research i finally found
a rigid pin coupling with the exact diameter
the potis needed to fit in.
The rotating end of the servo was a bit too small
to fit in the coupling, so i cut a piece of a straw
and wrapped a couple of layers iso tape arround it.
That made it fit perfectly, added some flexibility
to the connection and electrically isolated the
robot from the head.
Finally i replaced the setscrews in the coupling with nylon screws so i wouldn´t need any tools to attach / detach the robot.
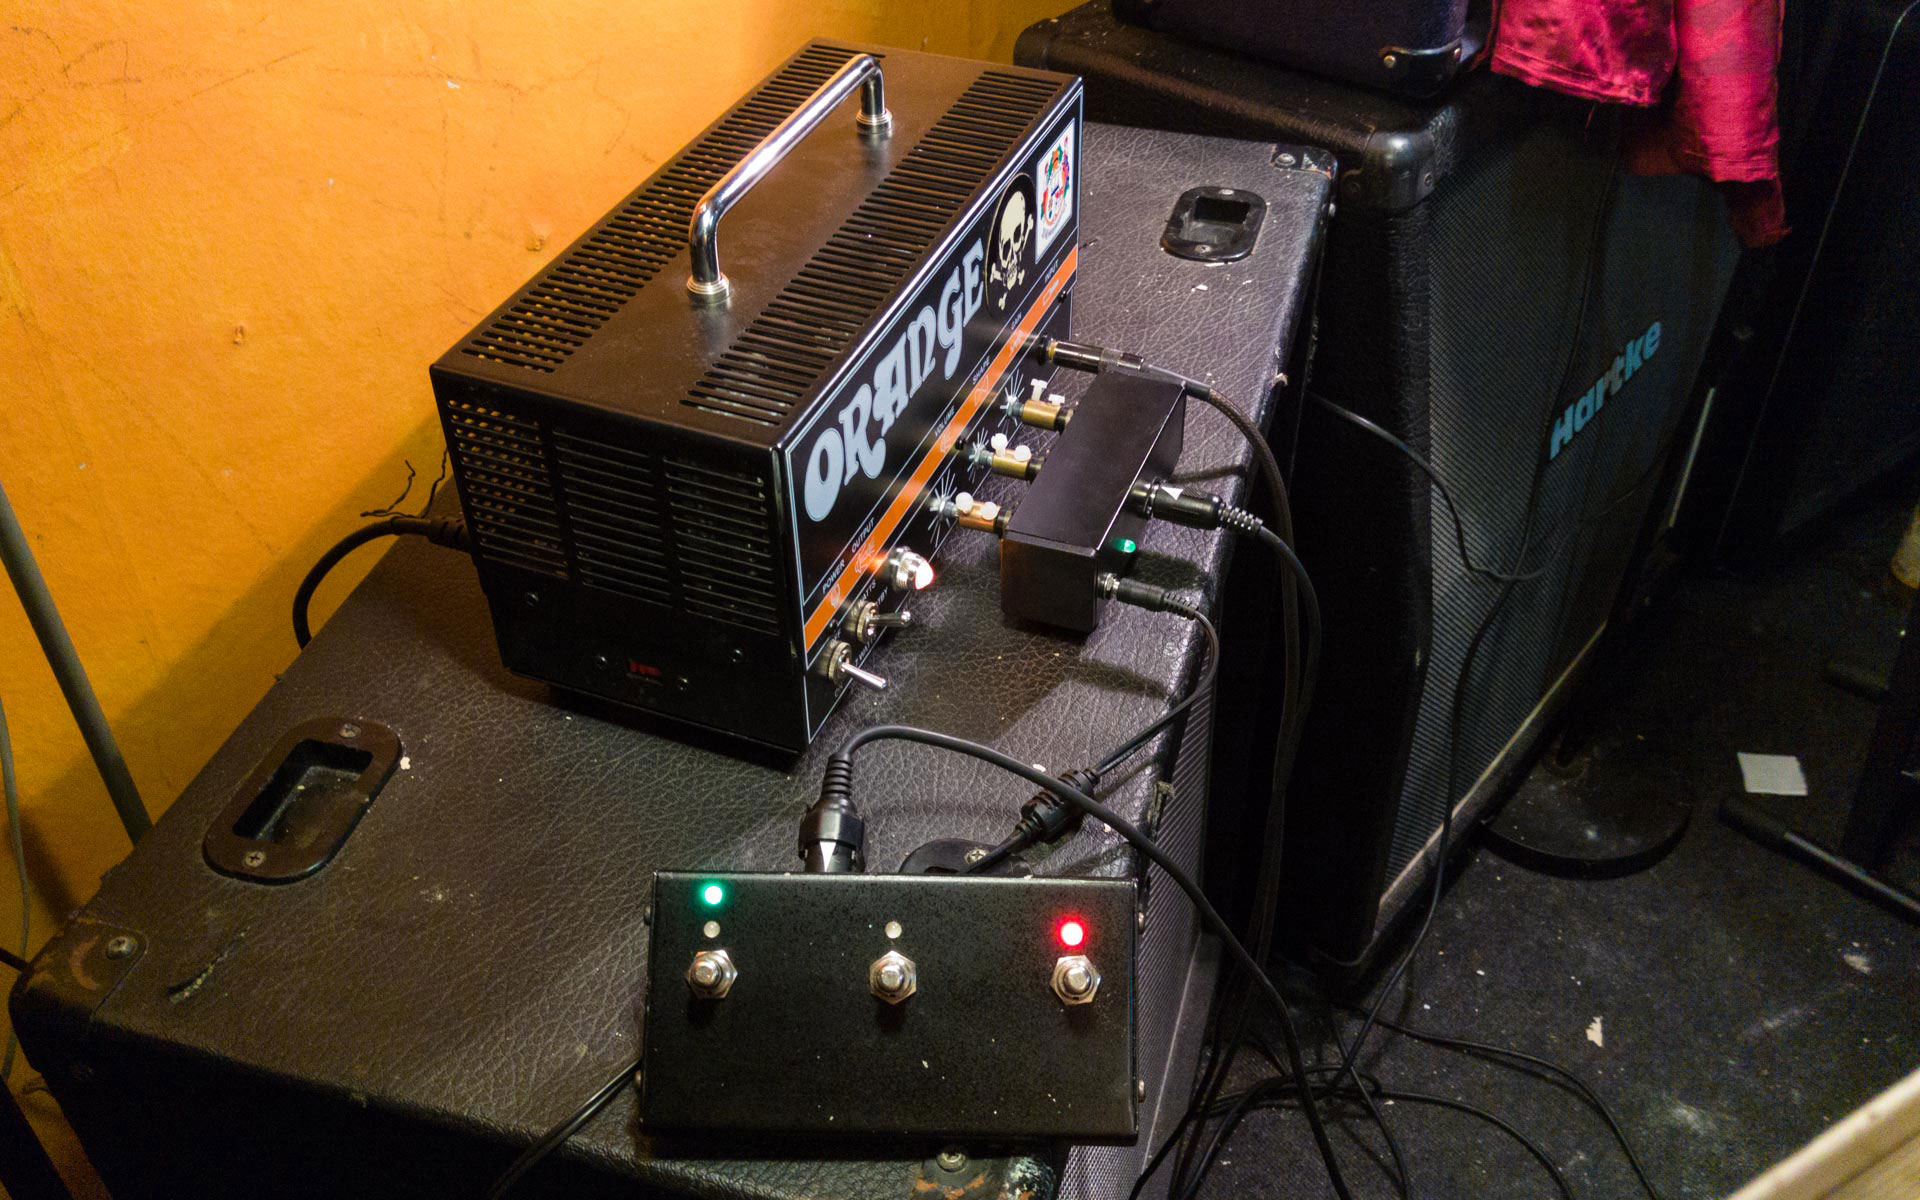
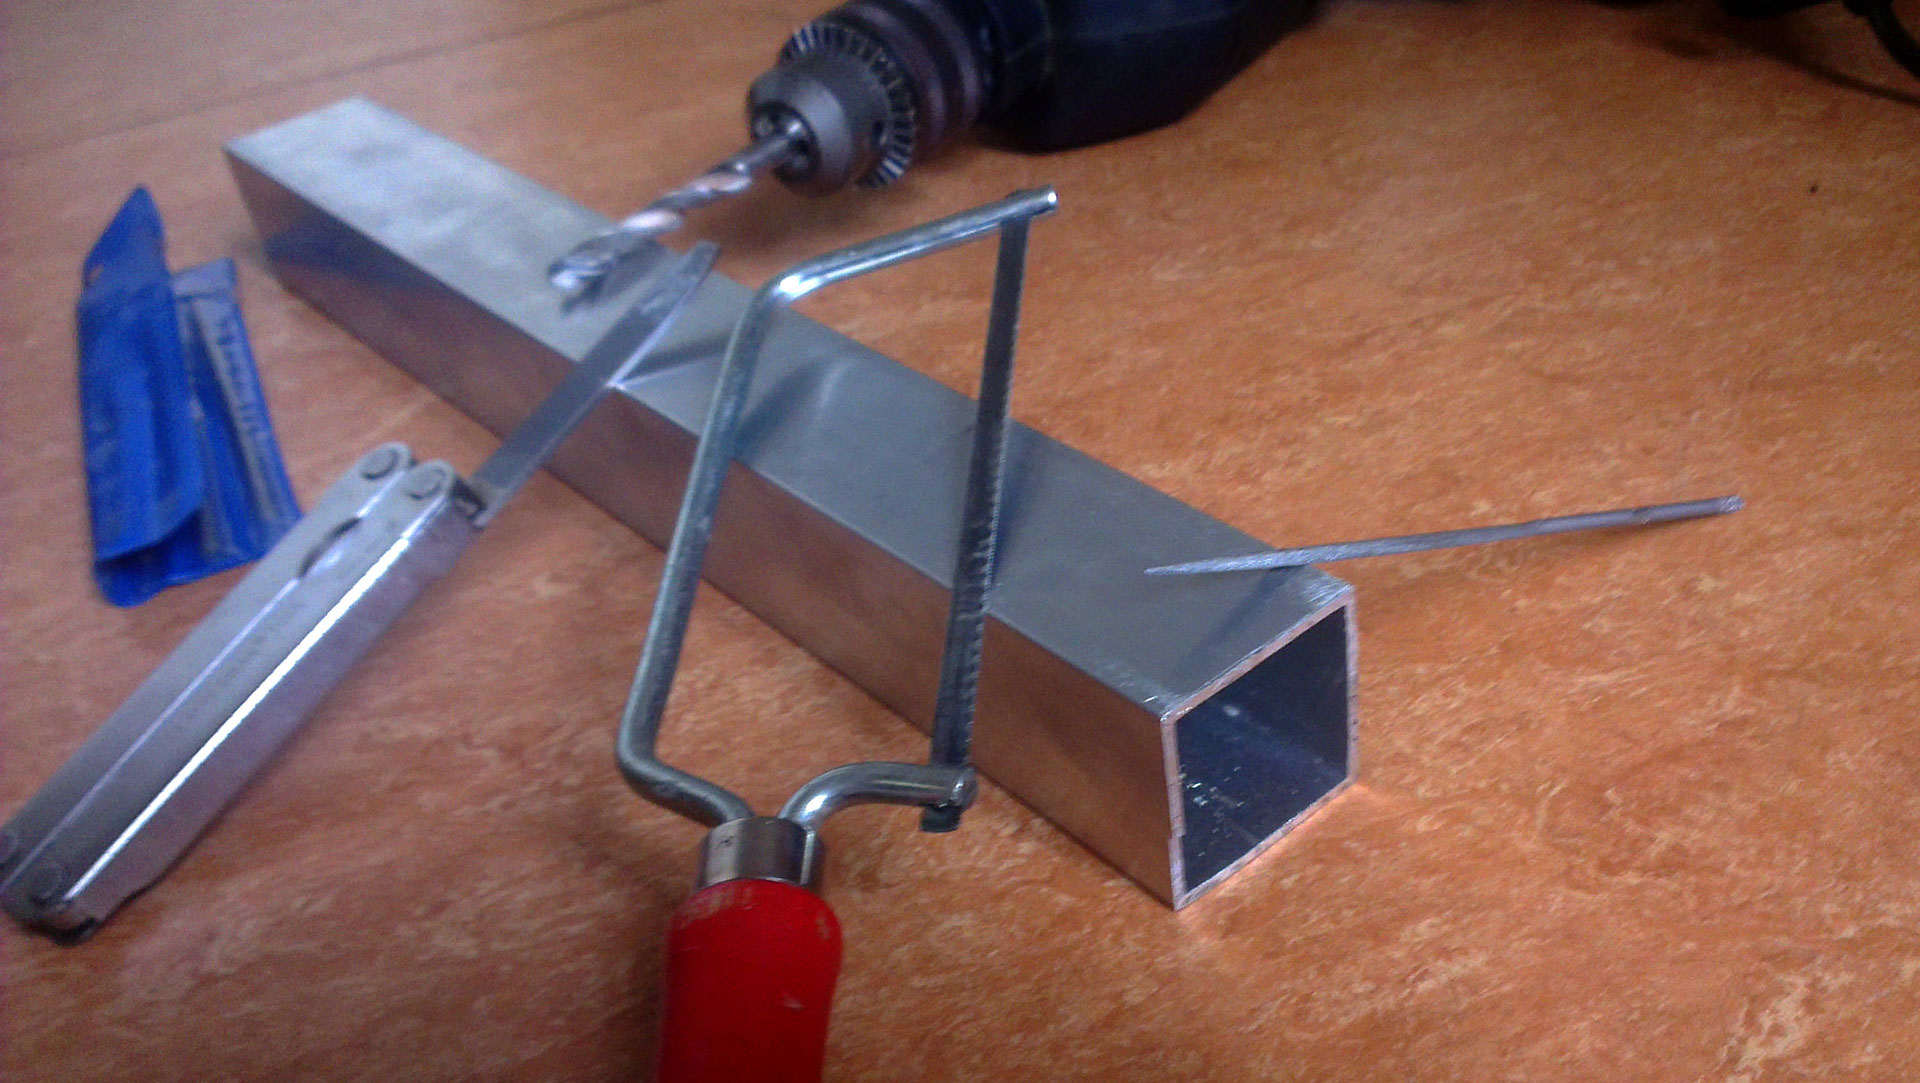
 For the housing i bought a sqaure aluminim
pipe with plastic end caps at the diy store.
(see gallery below)
Another lucky find where the lock nuts.
Used as feet the height is easily adjustable…
The total costs of the robot where arround 80€
including a spray can of black paint.
The project was completed within 2 weeks
end of 2013 in Berlin.
…and here´s how everything is wired up on the arduino board:
It turned out it was a good choiche using 180° servos instead of continuous rotation servos for my first arduino-servo project.
The 180° servos only cover arround 75% of the poti´s range but that´s totally enough and the risk of damaging the potis near zero.
Once terrorBot is powered on, the servos will move to a predefined initial position (e.g. minimum or maximum value).
Then the potis of the dark terror head can be positioned as needed before attaching the robot.
I´ve been using the terrorBot for almost 2 years now without any issue and i´m still impressed how easy it is
to get things up and running with an arduino board.
used tools and testing phase:


– INDIVIDUAL SERVO SPEEDs
– 12 PRESET SLOTS IN 4 BANKS
–> LONGPRESS BUTTON 2 & 3 WILL CHANGE BANK
– EDIT MODE
–> LONGPRESS BUTTON 1 WILL GO TO EDIT MODE FOR ACTIVE PRESET
— BUTTON 2 AND 3 WILL CHANGE THE VALUE UP AND DOWN
– BUTTON LEDs WILL INDICATE THE HEIGH OF THE VALUE
— SINGLE CLICK ON BUTTON 1 WILL JUMP TO THE NEXT STATE
— LONG CLICK BUTTON 1 WILL JUMP TO PREVIOUS STATE
— TRIPPLE CLICK BUTTON 1 WILL EXIT WITHOUT SAVING
— STATES:
-STATE-1: POSITION VOLUME
-STATE-2: POSITION SHAPE
-STATE-3: POSITION GAIN
-STATE-4: SPEED FOR VOLUME SERVO
-STATE-5: SPEED FOR SHAPE SERVO
–> THERE IS A TIMER HERE. IF NO BUTTON IS PRESSED FOR 5 SECONDS
ALL SERVOS WILL GET THE SAME SPEED AS SELECTED FOR VOLUME IN STATE-4.
-STATE-6: SPEED FOR GAIN SERVO
-STATE-7: SAVE AND EXIT
– COPY PRESET TO ANOTHER SLOT
–> LOAD PRESET YOU WANT TO COPY AND ENTER EDITMODE
— TRIPPLE CLICK ON BUTTON 3 WHILE IN EDITSTATE 1 WILL LAUNCH NEW SLOT SELECTOR
— DOUBLE CLICK ON ANY BUTTON TO CANCEL
— IF NO BUTTON IS PRESSED FOR 5 SECONDS SELECTOR WILL BE CANCELED
– BACKUP AND RESTORE PRESETS
–> HOLD BUTTON 1 DURING STARTUP FOR BACKUP
— THIS WILL SERIAL PRINT ALL VALUES IN AN ARRAY AND
BACKUP ALL VALUES TO HIGHER EEPROM SLOTS
–> HOLD BUTTON 1 AND 2 DURING STARTUP
TO RESTORE VALUES FROM HIGHER EEPROM SLOTS
– GLOBAL OFFSET
–> DOUBLE CLICK BUTTON 1 WHILE IN EDITMODE 1 TO SET MASTER VOLUME
— HOLD BUTTON 2 AND 3 TO CHANGE
— PRESS BUTTON 1 TO SET SHAPE OFFSET
— PRESS BUTTON 1 AGAIN TO SET GAIN OFFSET
— PRESS BUTTON 1 AGAIN TO SAVE AND EXIT
– FREEMODE
–> TRIPPLE CLICK ON DESIRED PRESET TO OPEN IT IN FREEMODE
— CONTROLL EACH SERVO WITH A SINGLE BUTTON
– PRESS AND HOLD BUTTON 1 WILL CHANGE VOLUME
– PRESS AND HOLD BUTTON 2 WILL CHANGE SHAPE
– PRESS AND HOLD BUTTON 3 WILL CHANGE GAIN
– SINGLE CLICK CHANGES EACH DIRECTION (LED ON = INCREASE VALUE)
– TRIPPLE CLICK BUTTON 1 TO EXIT
–> STATE WILL BE SAVED TO PRESET 12 ON EXIT
– METRONOME
–> HOLD BUTTON 3 THEN PRESS BUTTON 1 TO ACTIVATE
— HOLD BUTTON 2 AND 3 TO CHANGE SPEED
— PRESS BUTTON 1 TO EXIT
Thomas
Anthony
Alexei
fichl
Django
charly
Francois BERGERET
James Russell
Geert